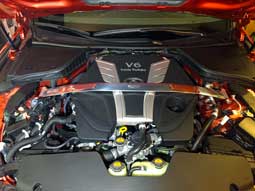
Instruction covers RWD and AWD Q60's.
The following are instructions to replace the front sway bar on Infiniti Q60 or Q60 AWD Coupes. It will also fit Q50 RWD and AWD sedans.
Special Thanks goes out to Mike at www.TunerzStore.com for his personalized support of the project!
|
Parts Supplied By:
 |
|
|
Tools needed: Ratchet, 12mm socket, 19mm socket, socket extention,17mm wrench, 8mm Allen wrench, nippers, small flat head screw driver or panel popper
|
|
|
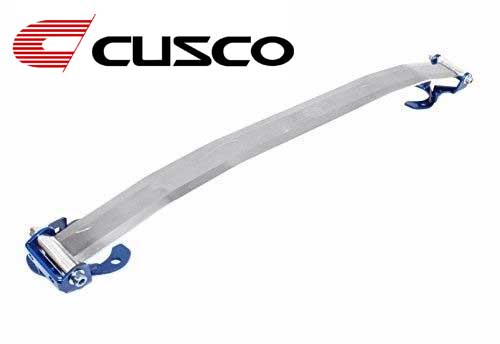 |
The Cusco brace arrived well protected for shipping with a quality box. The strut bar was in a plastic package and all parts were neatly wrapped. The bar was protected and detailed instructions were provided.
A zip tie was included and utilized as described below.
For this installation I removed the mounting plates from the bar for installation. This bar is MUCH lighter than it looks and the quality looks top notch.
NOTE: Perform this installation on level ground. It should also be noted that the Cusco FSTB mounting plates are powder-coated blue and prior to installation I had painted them a candy-apple red to better match the Dynamic Sunstone red color of this Q60 Red Sport |
|
|
|
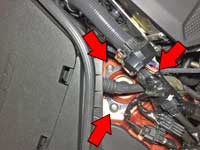
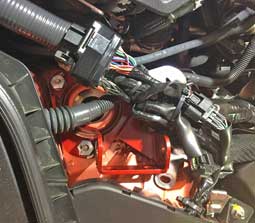
Step 1. I started on the passenger side by removing the 3 12mm bolts as indicated via the red arrows pictured to the left (top picture).
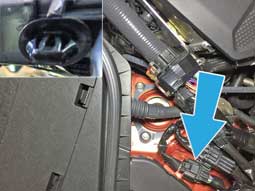
The lower image to the left indicates the connector that must be removed from its mount. The bundle retainers which hold the connectors to the plate are V-shaped as shown in the inset picture. I was able to use a small flat-head screwdriver to press in
and release one side first which allowed removal when pressing the other side. Remove both connectors from this metal mounting plate. Some may find a panel popper easier to use than a screwdriver.
|
|
 |
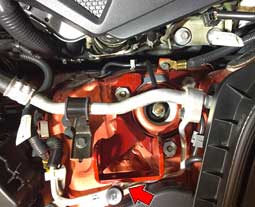
Step 2. Install the passenger side mount. This will take a bit of finesse to position it under the wiring and into proper position. Use the supplied 19mm nuts to install the mount.
Tighten the nuts to 38 N-m / 3.9 kg-m / 28 ft-lb. After installing the mount use the supplied tie-wrap to bundle the wiring together that was removed from the metal mounting plate. Use nippers to trim the tie-wrap end.
Note: For my installation I utilized some gasket material which may show in the images which is not supplied via Cusco. I used this simply to keep the nuts from scoring the fresh paint I used on the mounts.
|
|
 |
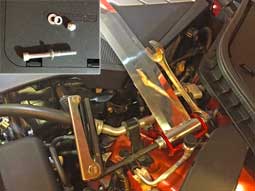
Step 3. The driver's side allows for easier access but can be somewhat of a challenge due to the AC low-pressure pipe. Again, there was some finesse involved to get the mount in position. Once in place install the supplied
19mm nuts onto the strut tower. Tighten the nuts to 38 N-m / 3.9 kg-m / 28 ft-lb.
Note: I installed a small rubber separator to keep the AC High Pressure pipe from resting on the mount as shown via the red arrow.
|
|
 |
Step 4. Time to attach the bar. Lay the bar over the engine cover and into the mounts at each side. Each side gets a mounting bolt, 2ea washers, 1ea lock washer, and a 17mm nut (inner-picture to the left).
Put a washer onto the bolt and slide it through the mount and the bar. Put the second washer, lock washer, and the 17mm nut on the other side and finger-tighten. Do this for both ends of the bar. At this time the bar should be in a flat position, but, make sure the bar is even before
final tightening. Use the 8mm Allen wrench and 17mm wrench to tighten the nut.
|
|
Time and Difficulty. Total time for installing the bar was 30 minutes as I was being extra careful and taking pictures. On a scale of 1 to 5, the installation is simple and requires
common hand tools so I would give this a 1.5 (easy).
|
|
Disclaimer: The author will not be held responsible nor held liable for any damages due to these instructions. Anyone following these directions are doing so at their own risk. This Documentation may not be distributed without the authors consent.
|


